Follow these 9 steps to launch your first production.
Click the Picoprod logo at the top left of the sidebar → + New project. Give it your production name. You can have multiple projects running in parallel.
Go to Team (sidebar) → + Member. Enter first name, role and pick a distinctive color. The color shows up on the Gantt and tasks.
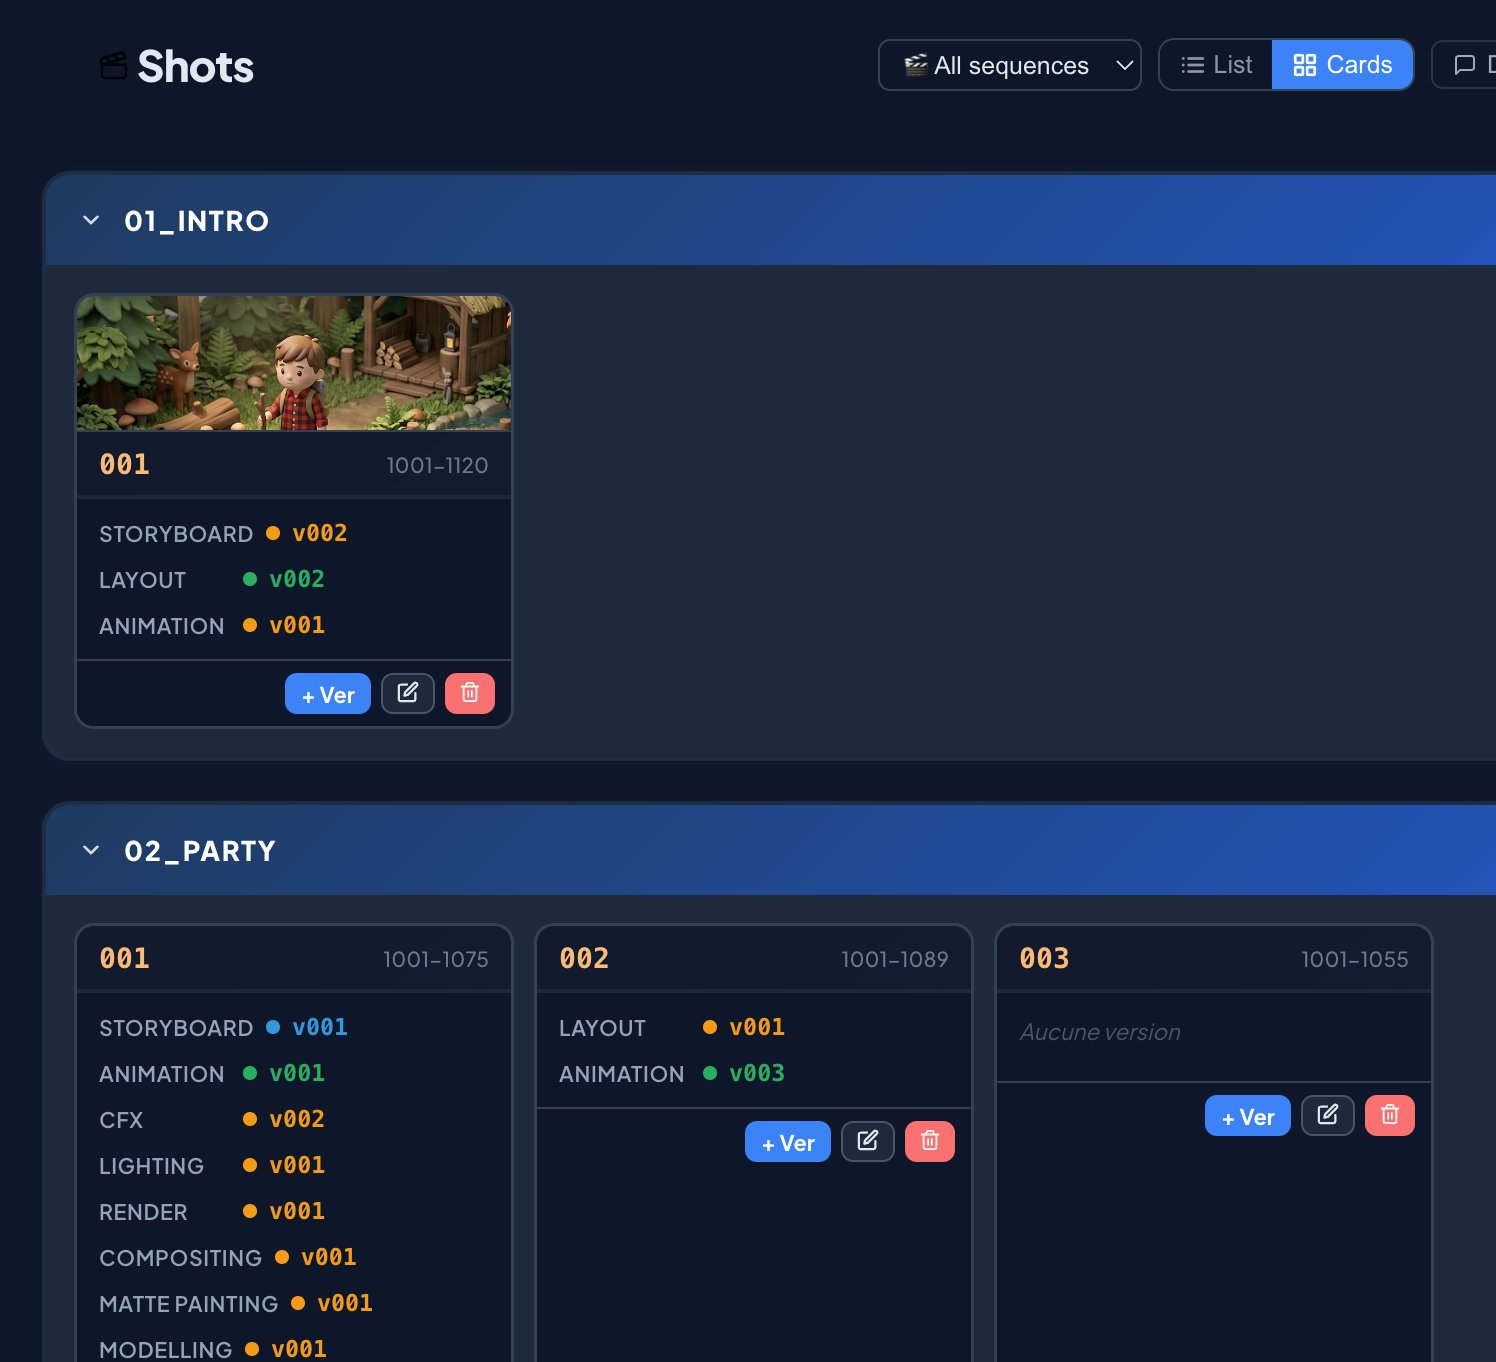
Go to Shots → + Sequence to create a group (e.g. 01_intro), then + Shot to add your takes. The ID forms automatically: 01_intro_010.
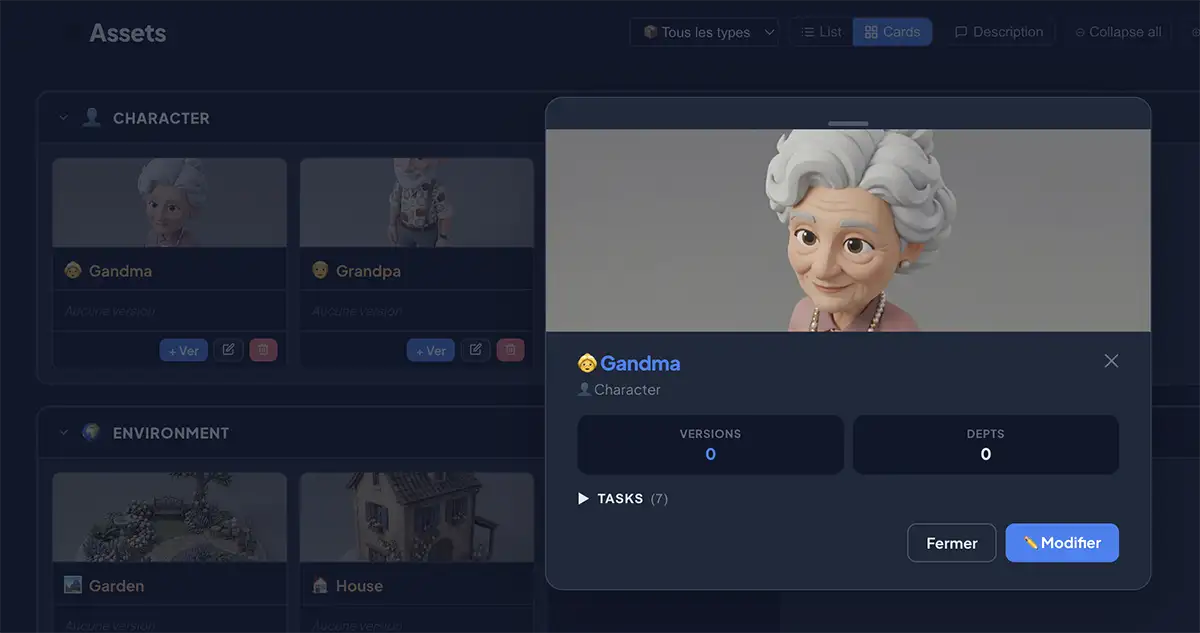
Go to Assets → + Asset. Set a name, type (Character, Set, Effect…) and emoji. Add a reference image via a Google Drive or Dropbox URL ⭐ Pro.
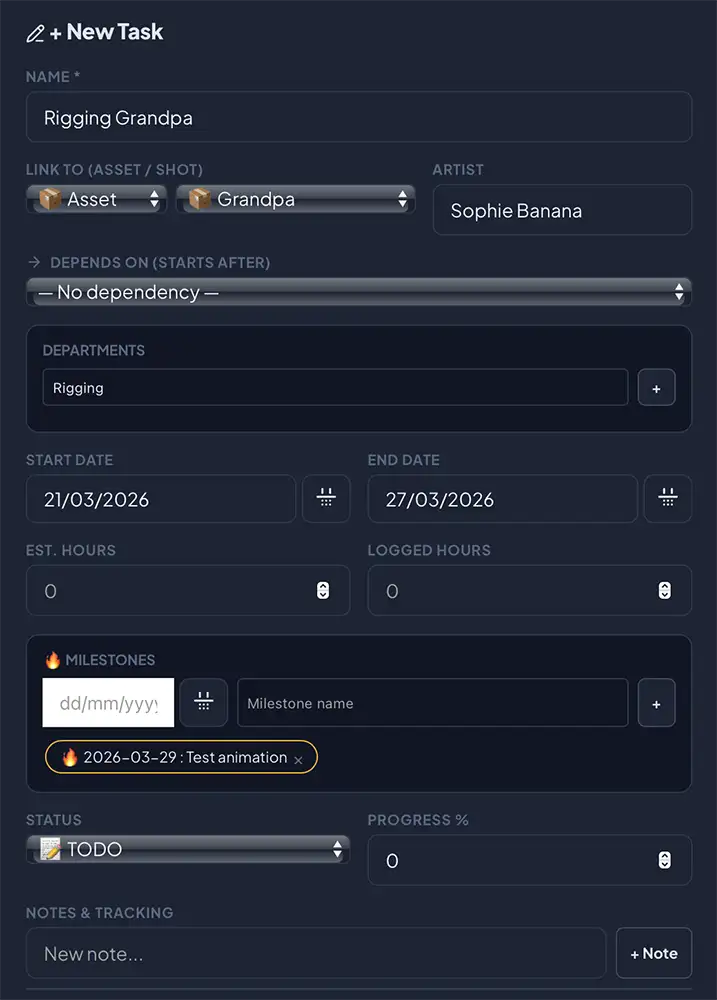
Go to Tasks → + Task. Set the name, assign an artist, choose departments, and set start/end dates. Link the task to a shot or asset.
Go to Templates → create your standard pipeline (Modelling → Rigging → Animation…). Then from a shot or asset, click Apply to generate all tasks in one click.
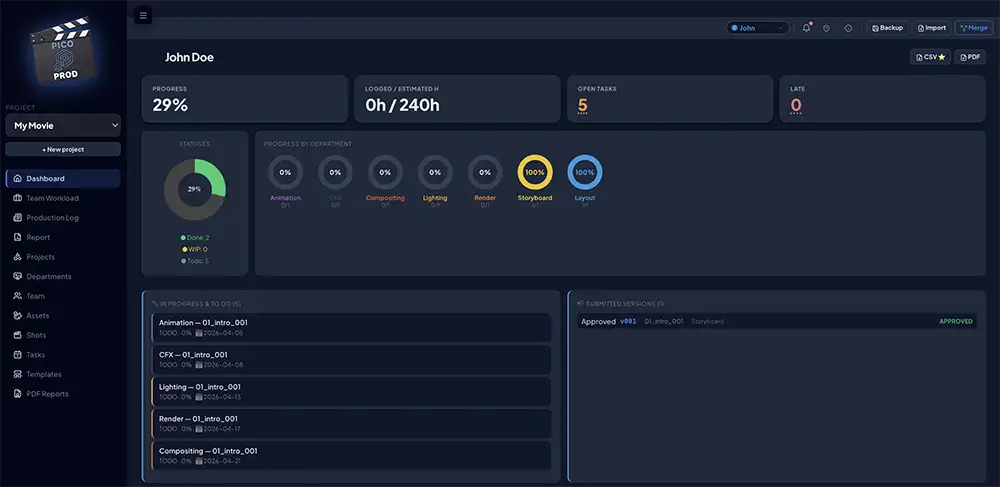
At the top right of the interface, click the identity selector and choose your first name. Your dashboard then shows only your tasks, submitted versions and received messages.
Picoprod runs 100% locally. Click Backup in the global bar to download a .txt file containing all your projects. Do this regularly!
Go to Budget (sidebar) → set your total envelope → add daily or hourly rates per artist or department. Planned and actual costs are calculated automatically from your task hours.
Your production is live. Explore the Gantt, Kanban, workload heatmap, production log and Budget module.